
5 Essential Embroidery Stitches Every Beginner Should Know (Machine Edition)
5 Essential Embroidery Stitches Every Beginner Should Know (Machine Edition)
 When you think of embroidery stitches, you might picture hours of handwork and a thimble or two. But with a commercial embroidery machine, those classic stitches are still the foundation—just digitized and stitched at lightning speed! Here’s a quick guide to the five most essential embroidery stitch types you’ll encounter (and use!) as a beginner in machine embroidery.
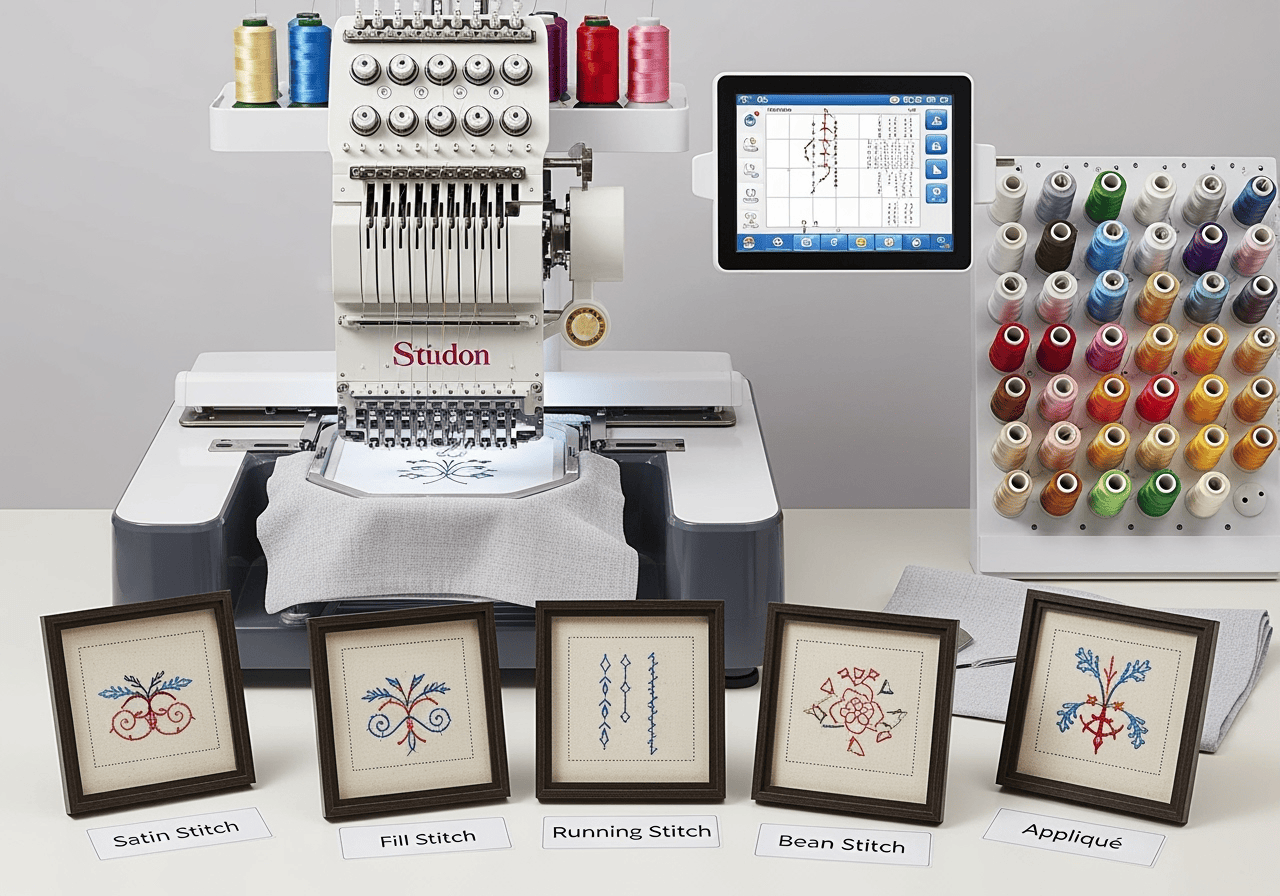
1. Satin Stitch
Where you’ll see it:
Names and monograms on polos
Bold outlines and details
Appliqué edges
2. Fill Stitch (a.k.a. Tatami or Ceding Stitch)
Where you’ll see it:
Large logos and backgrounds
Solid shapes and mascot designs
3. Running Stitch
Where you’ll see it:
Outlines of logos
Underlays (foundation stitches that add stability)
Fine text or intricate details
4. Bean Stitch (Triple Stitch)
Where you’ll see it:
Bold outlines
Decorative details that need to stand out
5. Appliqué
Where you’ll see it:
Team patches
Large, colorful letters or shapes on spirit wear
Final Thoughts
You don’t need to memorize every stitch type to get started—just know these basics, and you’ll be ready to tackle most beginner machine embroidery projects. The best part? Your commercial embroidery machine does the hard work for you, so you can focus on picking awesome designs and colors.
Got questions about stitches or want to see examples? Drop a comment or stop by the shop—RM Custom Screen Printing is always happy to help you master the basics!
