

Your Step-by-Step Guide to Getting Started
Your Step-by-Step Guide to Getting Started
So you want to try your hand at embroidery? Awesome choice! Whether you’re looking to personalize gifts, jazz up your wardrobe, or just need a relaxing hobby (trust me, it’s more zen than you think), embroidery is a fun and rewarding craft that anyone can learn. Here’s your no-nonsense, beginner-friendly guide to diving in—no experience required!
Step 1: Gather Your Essentials
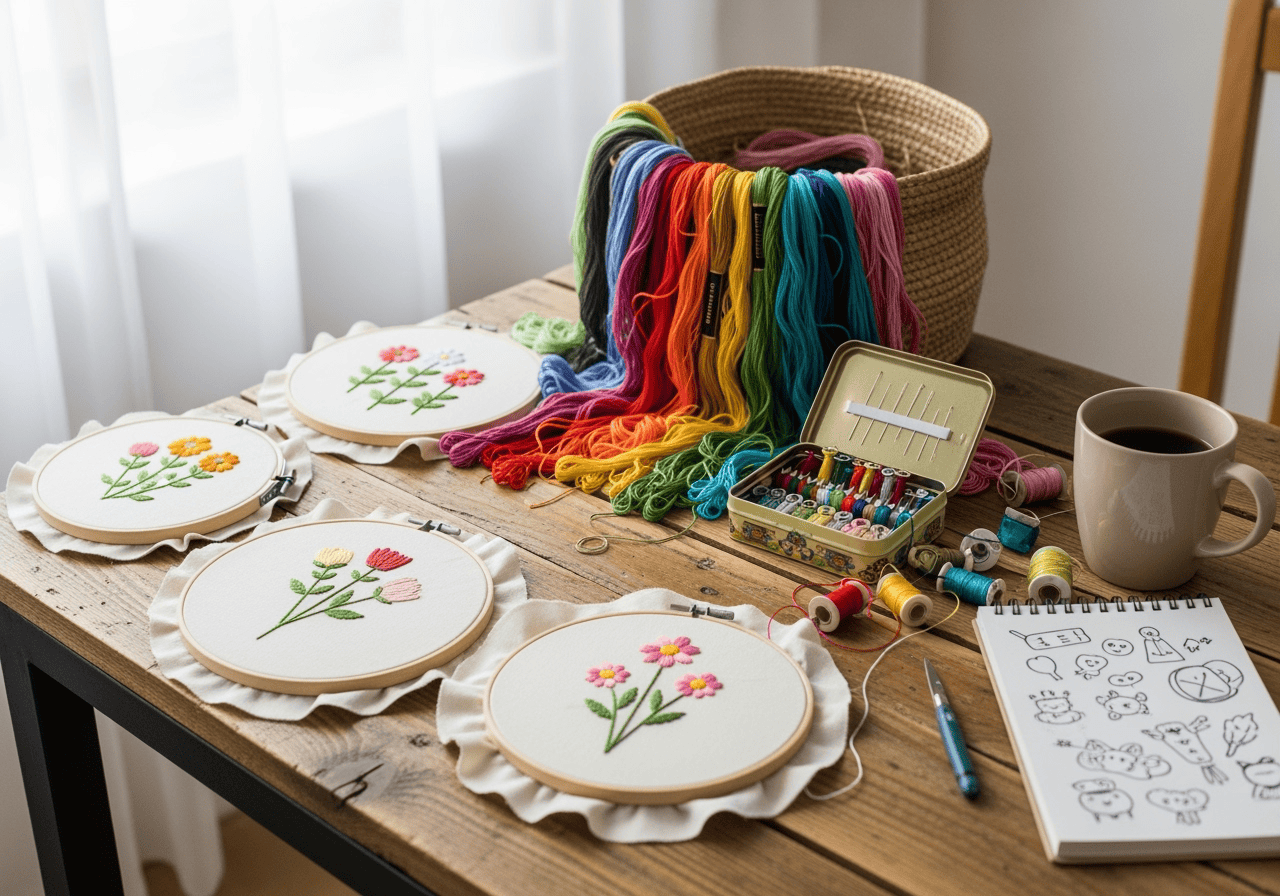
Let’s be real—you don’t need a suitcase of supplies to get started. Here’s what you actually need:
Embroidery Hoop: Start with a 6-inch wooden or plastic hoop. It keeps your fabric tight and your stitches even.
Needles: Look for embroidery needles (sizes 5–10 are great for beginners).
Thread: Six-strand embroidery floss is the go-to. Start with a few colors you love.
Fabric: Cotton or linen works best—think pillowcases, tote bags, or even old t-shirts.
Scissors: Small, sharp ones are ideal for snipping threads.
Pattern or Design: You can trace a simple design, print one, or doodle your own!
Pro tip: Grab a cup of coffee and a notepad for sketching ideas—it makes the whole process feel a bit more “official.”
Step 2: Prep Your Project
Wash & Iron Your Fabric: This helps prevent puckering later.
Transfer Your Design: Use a water-soluble pen, pencil, or transfer paper to get your design onto the fabric.
Hoop It Up: Place the fabric in your hoop, tighten, and pull it taut like a drum.
Step 3: Thread Up and Start Stitching
Cut Your Thread: About 18 inches is perfect (any longer and you’ll end up in a knotty situation).
Separate Strands: For most projects, use 2–3 strands of floss for a clean look.
Knot the End: Tie a small knot at one end to keep your stitches anchored.
Start with the basics: the backstitch, running stitch, and satin stitch. (Don’t worry, we’ll cover these in detail in a future post!)
Step 4: Enjoy the Process
Embroidery isn’t about perfection—it’s about creativity and having fun. If your stitches get a little wonky, don’t stress! Every piece tells a story (and if all else fails, just call it “rustic charm”).
Step 5: Finish and Show Off!
Remove the Hoop: Gently take it off and iron the back (with a towel on top) to flatten stitches.
Frame, Gift, or Wear: Display your masterpiece, gift it to a friend, or stitch it onto a favorite accessory.
Final Thoughts
Embroidery is easy to start, affordable, and totally addictive. Plus, you’ll end up with one-of-a-kind gifts and keepsakes. So grab your hoop and thread, put on your favorite playlist, and get stitching! (And hey, if you get hooked, you can always join our Graphics T-shirt Club for even more creative fun.)
Ready to try your first project? Let me know what you want to stitch or if you need a design idea—I’m here to help!
